

FOR OUR EXISTING CUSTOMERS
Your next chapter.
Alignet One.
If you use our previous platform, this guide walks you through the change: prepare your store, configure the new gateway and validate your first payment.
WordPress / WooCommerce · 5 guided stages
YOUR PATH TO ALIGNET ONE
Guided path for WordPress / WooCommerce
This path is for WordPress / WooCommerce. If you use PrestaShop, VTEX, Web Checkout or an SDK, coordinate the migration procedure for your channel with Alignet before applying these steps.
Prepare the update
New gateway file
.zip file provided by Alignet ready. Do not unzip it.Site backup
Administrator access
Low-traffic window
Merchant registration data
Stage outcomeComplete backup, ZIP and access ready.
Merchant registration data
- Sign in to Alignet Command Center with an authorized account.
- Complete the merchant registration with the corresponding information.
- When registration is complete, immediately save the three values shown in the confirmation.
Stage outcomeMerchant code, Client ID and Client Secret stored securely.
Install the new plugin
- Go to Plugins → Add Plugin → Upload Plugin.
- Select the
.zipfile and click Install Now. - Activate Alignet Gateway and confirm that it appears as active.
- Only then, deactivate and remove the previous WooCommerce plugin.
Confirm the plugin versions
Confirm the plugin versions
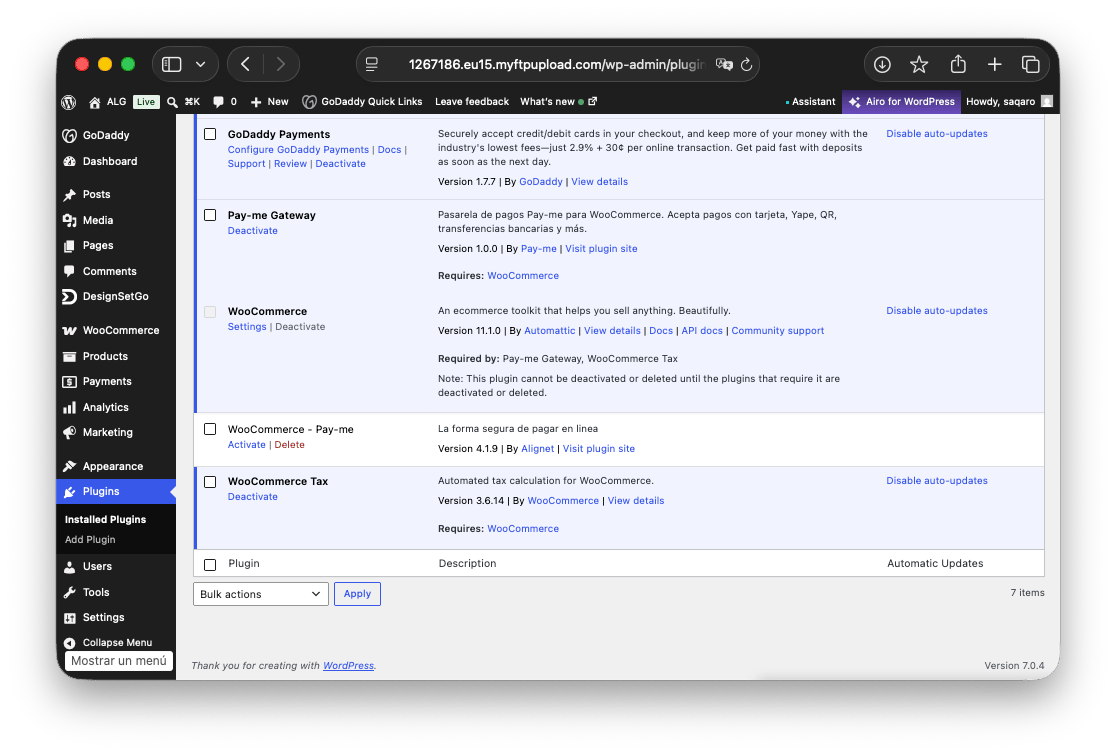
Stage outcomeNew gateway active and previous version removed during the change window.
Enter the credentials
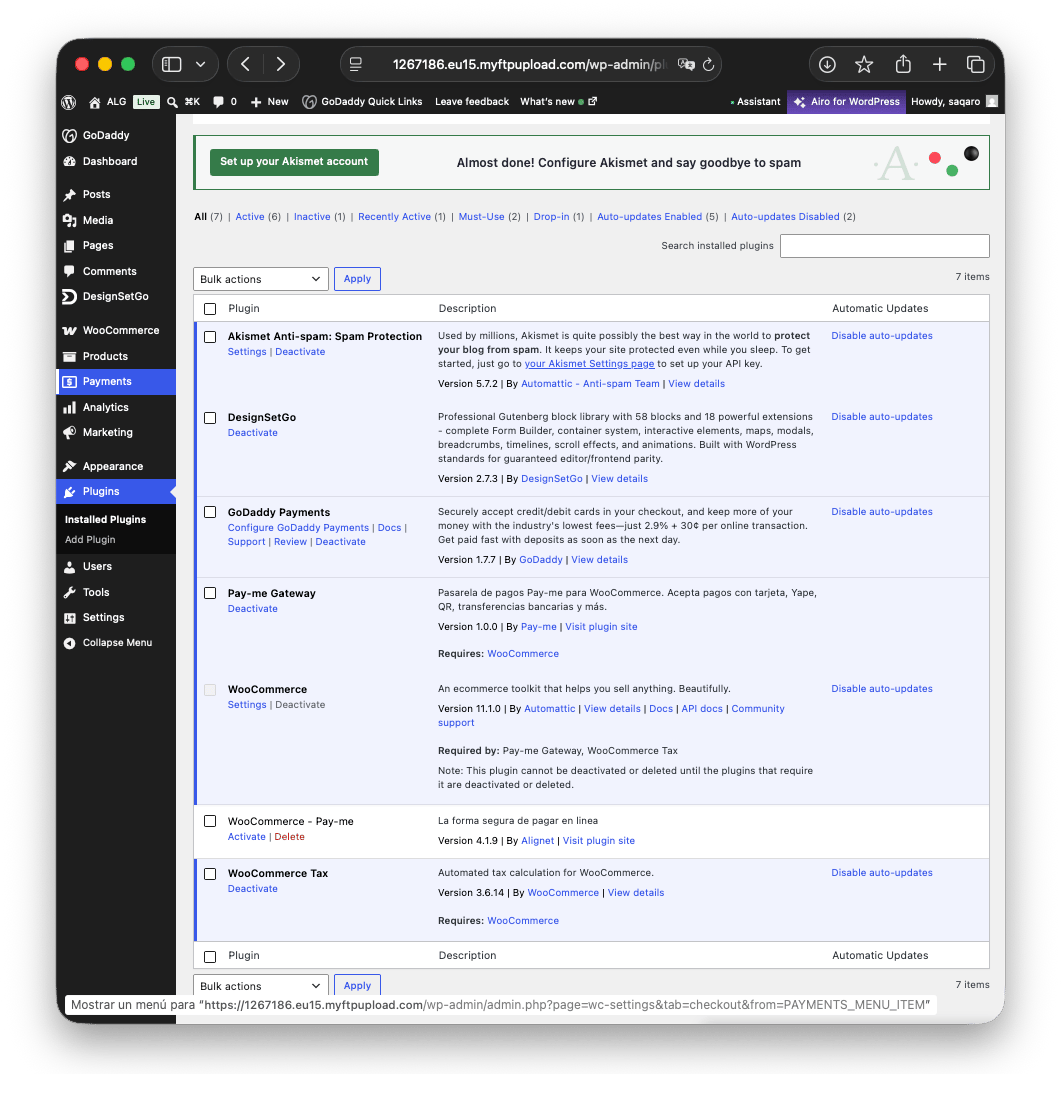
- Open Payments in the WordPress sidebar.
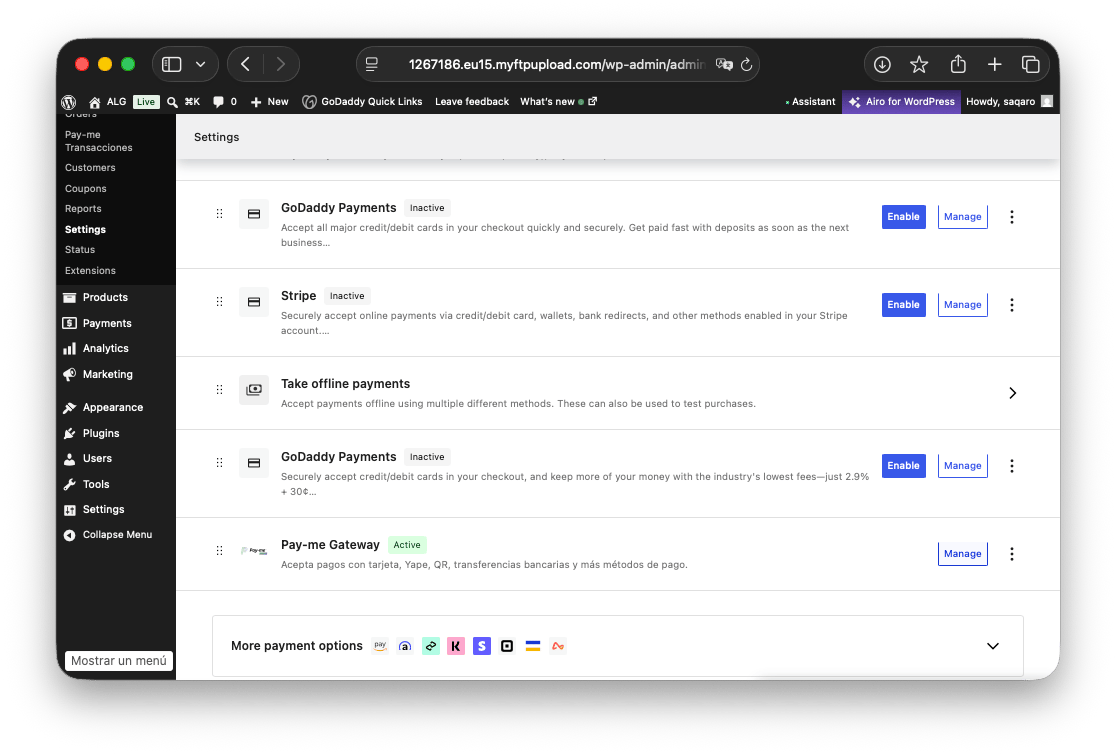
- Find Alignet Gateway, confirm that it is active, and select Manage.
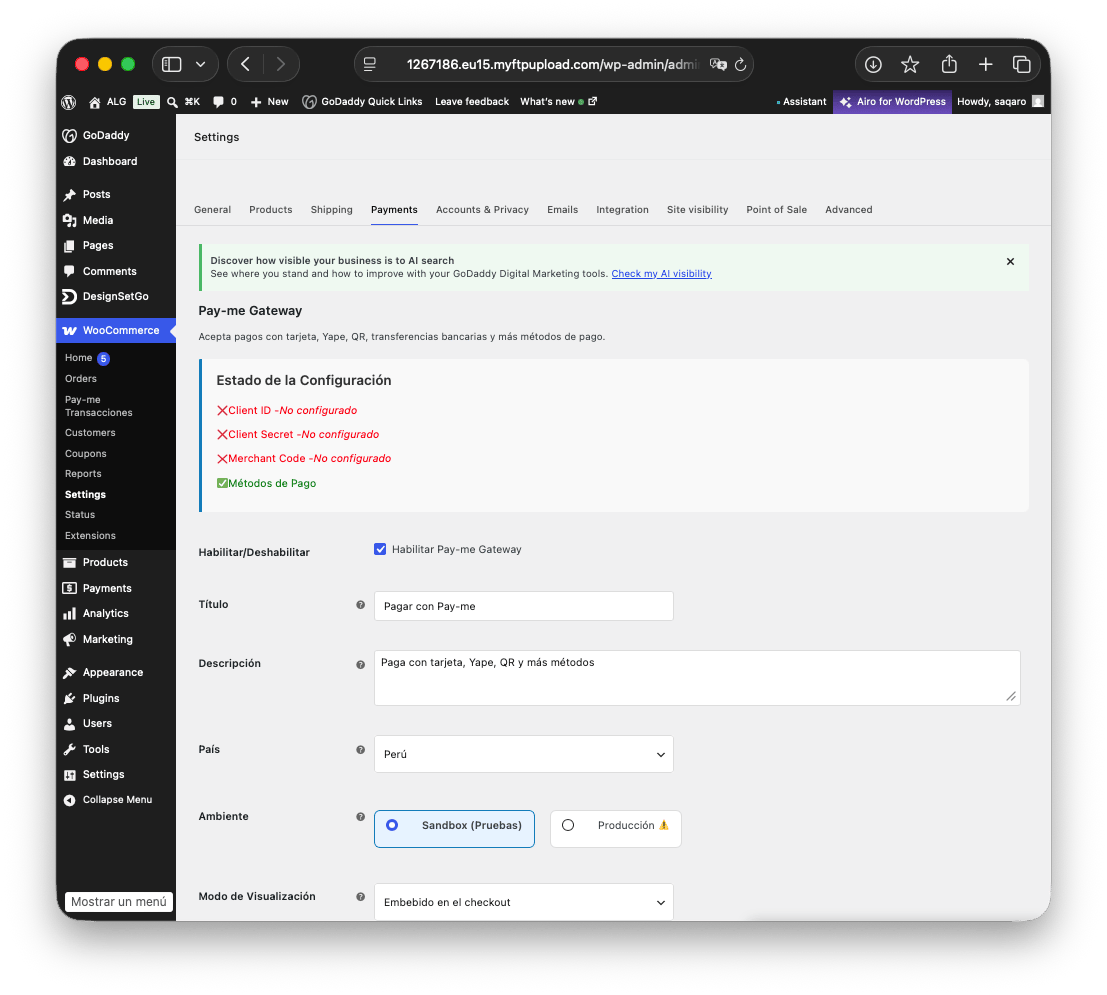
- Complete the configuration using the values saved when the merchant was registered in Alignet Command Center.
- Review the environment, currency, and display mode. Then click Save changes.
code as Merchant Code, then copy the Client ID and Client Secret into the fields with the same names. Complete the block for the currency you are configuring.Find Payments in WordPress
Find Payments in WordPress
Open Manage for Alignet Gateway
Open Manage for Alignet Gateway
Review environment and display mode
Review environment and display mode
Enter credentials for each currency
Enter credentials for each currency
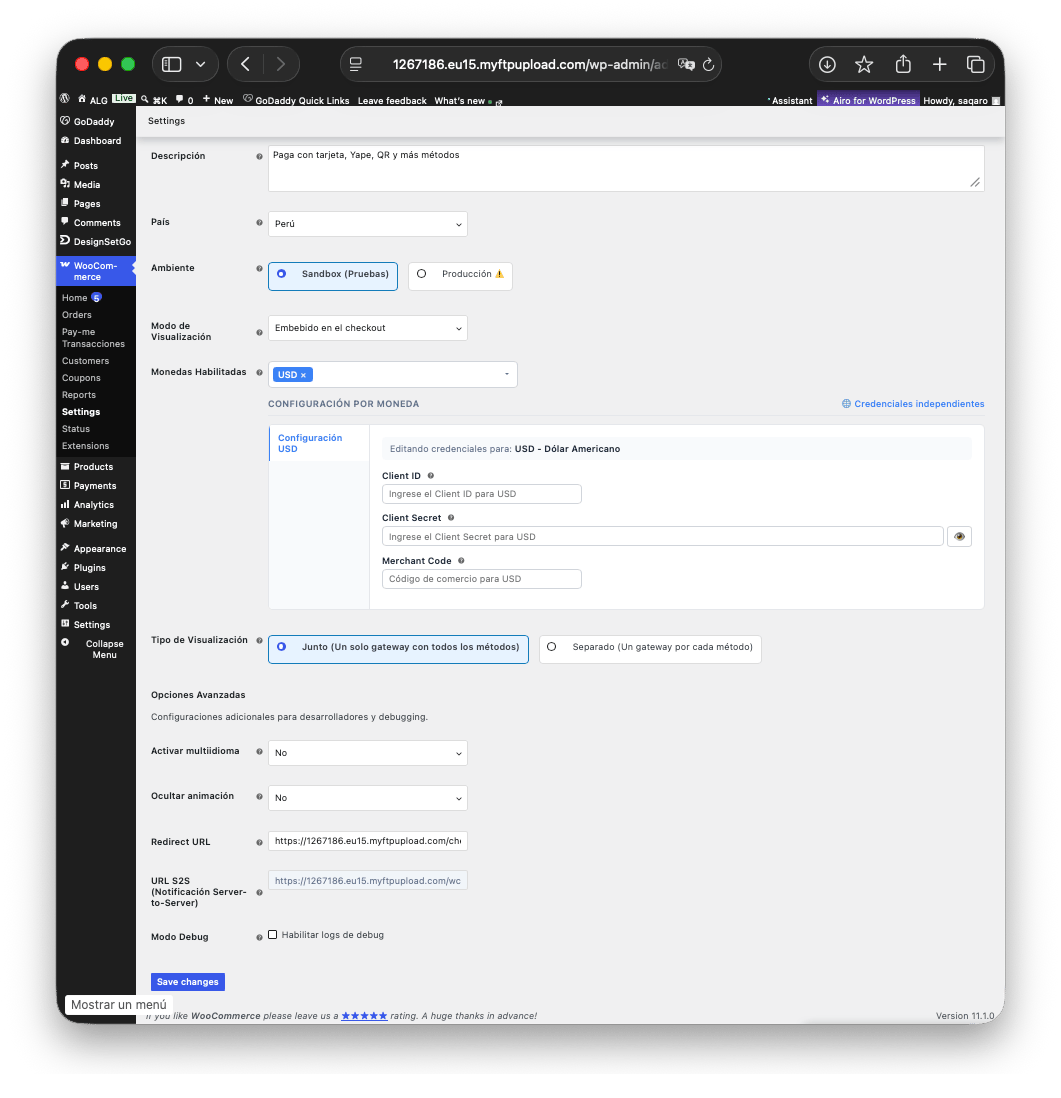
Stage outcomeEnvironment, currency and credentials saved.
Validate before finishing
- Configuration status: Client ID, Client Secret, and Merchant Code appear as configured.
- Assisted test: perform a test or sandbox checkout with support from the bank and Alignet.
- Error log: open WooCommerce → Status → Logs and confirm there are no Alignet errors.
- Change control: record the date, versions, and person responsible.
Stage outcomeCheckout tested, logs reviewed and change documented.